

When Should a Roof Tarp Be Installed to Protect Your Home?
12/10/25
6 Min Read
After a severe storm or sudden leaky roof, a roof tarp can be the difference between minor damage and a costly repair. Tarps provide an immediate layer of protection, keeping out rain, debris, and pests until professional repairs can be made. Knowing when and how to use one helps safeguard your home and prevents additional structural or interior damage.
In this article, you’ll discover:
- When roof tarps should be installed.
- How tarps protect your home from water intrusion.
- The difference between short-term and long-term protection.
- Why professional installation ensures safety and effectiveness.
When a Roof Tarp Is Needed
A roof tarp is typically installed after an event that compromises the roof’s ability to keep out water. These issues can arise suddenly or develop over time.
- Storm damage: High winds, hail, or fallen branches can tear shingles or puncture decking.
- Active leaks: Water stains on ceilings or walls indicate moisture is already entering.
- Missing or broken shingles: Even small gaps can allow water to penetrate and spread damage.
- Fire or tree impact: Structural openings require immediate covering to prevent further interior damage.
- Delayed repairs: When a full roof replacement can’t be scheduled right away, a tarp provides temporary protection.
Installing a roof tarp as soon as damage is identified helps reduce the amount of moisture reaching your attic and insulation—two areas that are costly to repair once water seeps in. It’s an important first step in preventing more extensive damage before emergency roof repairs can be completed.
How a Roof Tarp Protects Your Home
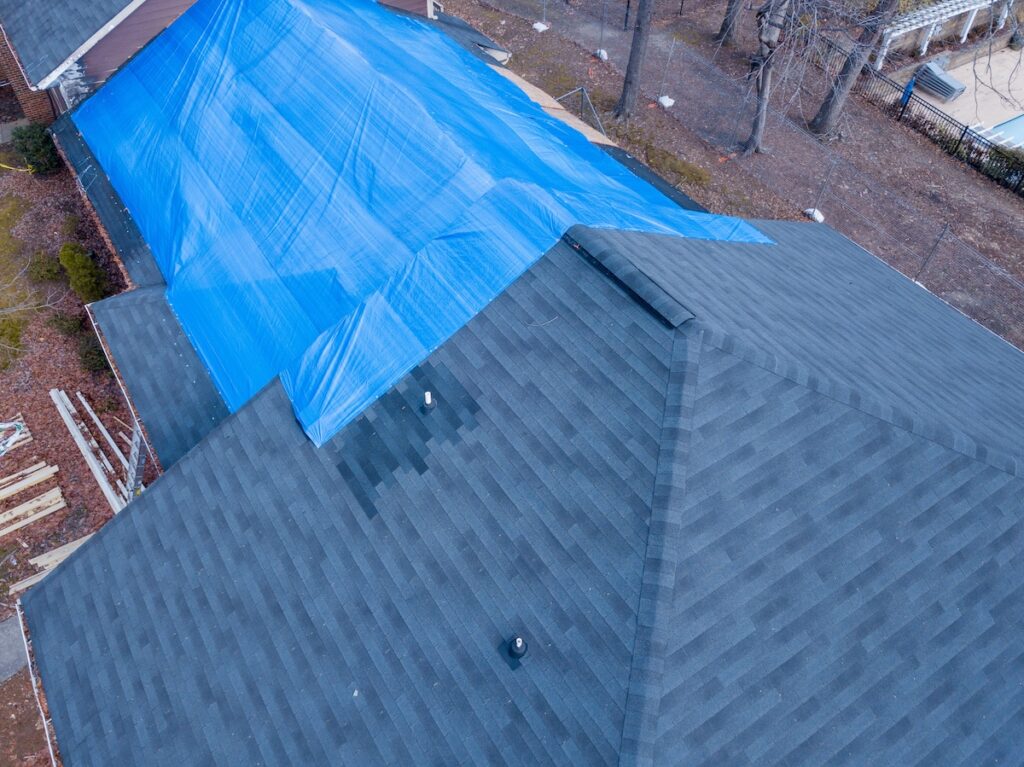
A properly secured tarp acts as a waterproof seal and weather barrier that prevents rain and debris from entering through exposed sections of roofing material. It’s particularly useful in emergencies when permanent repairs can’t be completed right away.
- Water protection: Keeps the interior dry during storms.
- Wind resistance: Weighted and anchored edges prevent flapping or tearing.
- UV defense: Blocks sunlight from further degrading damaged materials.
- Energy efficiency: Helps maintain indoor temperature by sealing temporary openings.
Comparing Roof Tarp Options
Before selecting a tarp, it’s important to understand the differences in durability, materials, and weather resistance. The table below compares the most common roof tarp options to help you choose the right level of protection for your situation.
| Tarp Type | Typical Lifespan | Material | Best Use | Weather Resistance | Approx. Cost (per sq. ft.) |
| Lightweight Poly Tarp | 1–2 weeks | Polyethylene | Short-term emergency cover | Moderate | $0.05–$0.10 |
| Heavy-Duty Poly Tarp | 1–3 months | Reinforced polyethylene | Temporary roof protection | High | $0.10–$0.25 |
| Vinyl Tarp | 3–6 months | PVC-coated fabric | Extended temporary protection | Very High | $0.20–$0.40 |
| Canvas Tarp | 1–3 months | Cotton or blended fibers | Non-waterproof, breathable cover | Low | $0.15–$0.30 |
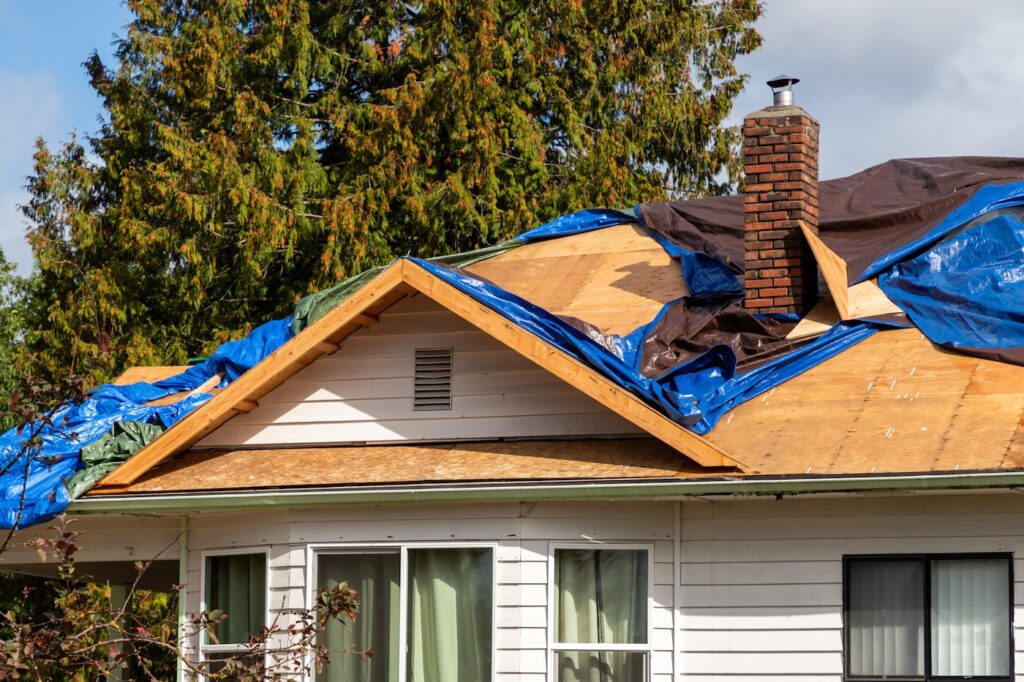
5 Steps for Effective Roof Tarp Installation
Installing a tarp may sound simple, but doing it correctly requires proper roofing tools, timing, and technique. Following these five steps helps ensure your tarp provides strong, weatherproof coverage and keeps your home protected until permanent repairs are complete.
- Step 1: Identify where the roof has been compromised and clear away loose debris. Avoid climbing onto unstable sections, and only proceed if it’s safe to access.
- Step 2: Select a heavy-duty, waterproof tarp that fully covers the damaged area with at least four feet of overlap on all sides.
- Step 3: Roll the tarp edges around wooden boards and screw or nail them into the roof deck to prevent flapping or tearing.
- Step 4: Use roofing nails, sandbags, or adhesive strips to reinforce edges and keep out wind and water.
- Step 5: Check that the tarp is tight, secure, and angled properly so rainwater drains off instead of pooling.
These steps create a stable, weather-tight barrier that prevents interior leaks and helps the home remain protected until a professional team of roofers can perform emergency repairs safely.
Professional vs. DIY Tarp Installation
While many homeowners attempt to tarp their own roofs, professional installation is safer and more reliable. Roof surfaces can be slippery and unstable after a storm, increasing the risk of falls or injury.
Professional roofers have the tools, ladders, and safety harnesses needed to secure the tarp tightly without causing further roof damage. They’ll ensure the tarp is properly anchored around flashing, vents, and ridges—key areas where water intrusion often occurs. A trained contractor can also identify underlying issues you might miss, such as damaged decking or hidden leaks.
A renowned roofing company also has better access to specialized materials that last longer than retail tarps and can ensure the seal remains weather-resistant in heavy winds or ongoing storms.
How Long Can a Roof Tarp Stay in Place?
Most emergency tarps are designed for temporary use, typically lasting 30 to 90 days depending on material quality and weather conditions. Heavy-duty tarps can last longer, but should not replace permanent roof repairs.
Homeowners should check periodically for shifting, tears, or pooling water. If the tarp becomes loose or worn, it should be replaced immediately to maintain protection. Keeping the tarp in good condition helps prevent interior water damage and mold growth until permanent repairs are completed.
Tips for Maintaining a Tarped Roof
Preventive care and timely maintenance help extend the tarp’s life and ensure it continues to protect your home. Keeping it clean and tightly secured also helps maintain a strong waterproof seal and keeps debris from building up around the edges. Tarps used on a construction site or large property should be inspected frequently for shifting or damage from heavy equipment.
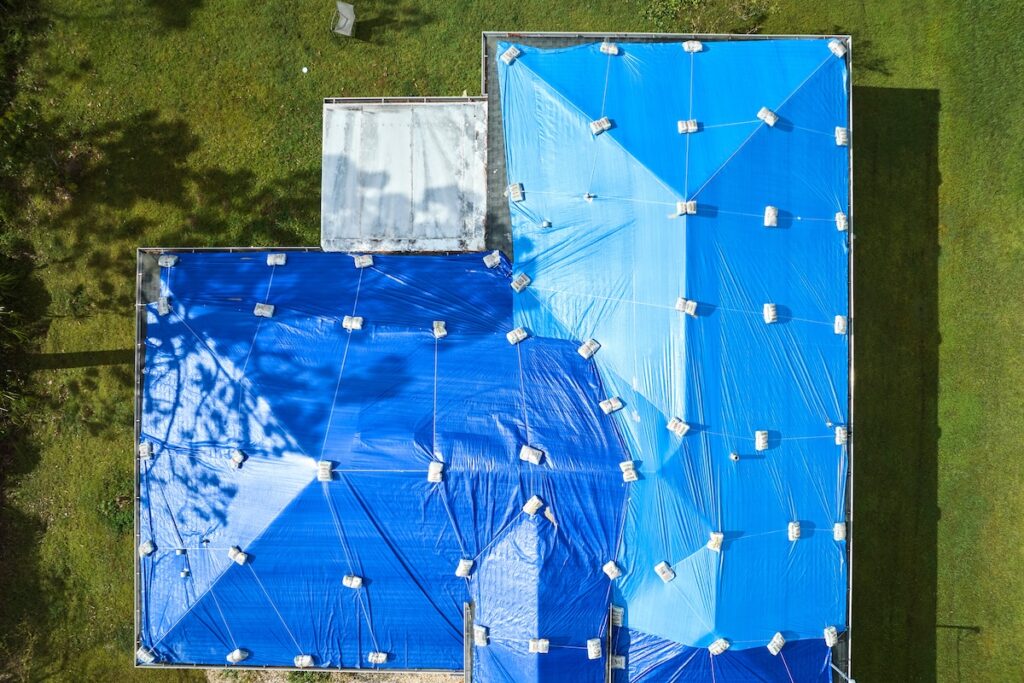
- Inspect after high winds: Tarps can shift or tear in extreme weather.
- Avoid climbing onto the roof: Use binoculars or call a roofer for inspection.
- Check attic spaces: Look for signs of leaks or moisture buildup.
- Schedule permanent repairs quickly: A tarp is only a short-term fix.
Protecting Your Home with Buckeye State Roofing
When your roof is damaged, fast action is crucial. Buckeye State Roofing provides prompt emergency services, including professional roof tarp installation and detailed inspections to assess the extent of damage. Our team ensures your home stays protected from further water exposure while you plan permanent repairs or file an insurance claim.
If recent storms have left your roof exposed or leaking, contact Buckeye State Roofing to schedule your inspection and temporary protection service. Quick action today can prevent major repair costs tomorrow.
